Monday, April 13, 2020

Creating a simple Console App that Uses Entity Framework Core

This post is a step by step guide in creating a simple Console App that used Entity Framework Core 3.1 (latest version as of the moment). The IDE we are using is Visual Studio 2019. The database we will be using is for SQL Server.

1. Create a blank solution, we can do this by clicking on the Create a new project on the Visual Studio 2019 home/welcome screen.

2. On the Create a new project screen, we can type in "Solution" on the search box, select the Blank Solution option then click on the Next button found at the bottom right of the screen. 

3. Enter a solution name and select a folder to where the solution file would be saved.

4. Now that we have the solution let's add a new project, we can do this by right-clicking on the Solution Explorer pane, select Add then New Project.

5. First we create a C# Class Library project, type in "Class Library" for the Entity Framework Core data classes. You can enter your specific name for the class library. You can delete the auto-added Class1 class file as we are not going to use that.

6. Then let's create a new Class Library project for the Domain/Entities, this time you can select the Class Library from the Recent project templates
7. We then add the console app that would implement the domain service. On the Add new project screen, let's search for the C# Console app

8. Now that we have all our needed projects, let's add the project references of the Domain/Entities and Data projects to the Console App. On the console app tree,right-click Dependencies then click on Add Reference. Check the two projects there.
9. We also need to add a reference of the Domain/Entities project to the Data project, as we would be using the entities there to build our DbSets. DbSet class is used to perform the Create/Read/Update/Delete (CRUD). They are used to map the tables to the database.

10. We then need to install the Entity Framework Core packages as they are not added by default. We can do this by using the Package Manager console or the Manage NuGet Packages option, we are going to use the latter.

11. Right-click on the Data project, then select Manage NuGet Packages.

12. On the NuGet Package screen click on Browse, as this would allow us to search online for the package then on the search textbox enter "EntityFrameworkCore.SqlServer". This is the option that we will also choose as this would install all the required EF Core packages we need as well. Select the latest stable version then click on Install


13. We should now have the three EF Core packages installed on the Data class library:
  • Microsoft.EntityFrameworkCore
  • Microsoft.EntityFrameworkCore.Relational
  • Microsoft.EntityFrameworkCore.SqlServer
14. Next up, we are going to add some sample Entities on our Domain class library:
  • ProductCategory
  • Product


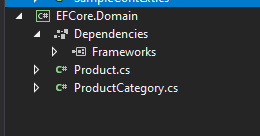
This entities would represent the our database tables, notice on the Product class we added a reference to the ProductCategory, now EF Core is smart enough to determine the relationships between the classes and also the primary key it would use for the tables it would generate.

15. Next we need to add a Context class in our Data class library. This class is would let EntityFramework know which entities represents a table in our database. We define them by using the DbSet type ex. DbSet<ProductCategory> ProductCategories.


16. Now we implement this on our Console App. We also need to make sure that our Console App is the starting project, you can do this by right-clicking on the project and clicking on Set as Startup Project

Our Main.cs class code


EnsureCreated() makes sure that the Database and tables are already created in our DB, if not this execution would create them.

17. Now we execute the code by clicking on F5 or ctrl + F5 (No debugging). The initial loading should take a while as EF Core would be generating the database scripts first based on the DbSets we have. Then it would use them to create the database and tables based on the connection string we have set. You should get the results below: 


18. If you would check your database using SQL Server Manage Studio, you should be able to see your DB and table there:

19. As you can see from the Main class code, working on database is just like using collections and linq. For more information about Entity Framework Core, you check on the Microsoft Documentation site for it:

Happy coding!

Thursday, August 1, 2019

Content Security Policy Basics

What is Content Security Policy (CSP)?

Response headers that allows web site administrators to control which resources are loaded on a given page. We control this by setting policies structured below:
Content-Security-Policy: <policy-directive>; <policy-directive>
The following example creates a default source to 'self' (server origin) and a style-src to 'self' and allows any css loaded from a somedomain.com domain:
Content-Secuirty-Policy: default src 'self'; style-src 'self' *.somedomain.com;

What is Cross-Site Scripting (XSS)?
Cross-SIte Scripting, is a client-side code injection attack. One type of vulnerable a page has to this kind of attacks if it does not validate or encode text that is entered to it's input control. With this a hacker can input a malicious script on the text then when saved and loaded back, the page would then execute that script.

Types of XSS Attacks

  • Embedding of External Resources on the Page
  • Writing Scripts to the Page Source
  • Modifying the Document Object Model (DOM)
Please find link on the References section below for more information about Cross-Site Scripting.

Commonly Used Directives

Policy Directive
Description
default-srcThis directive contains the default values, for example if script-src is not specified, it used what is set on the default-src
script-srcThis directive controls the script resources locations (.js files), if we have referenced remote scripts we can specify the url for that on this directive
style-srcThis directive controls the style resources locations
object-srcThis directive controls being loaded on the page ex. flash
media-srcThis directive controls the media resources being loaded ex. mp3
frame-ancestorsThis directive controls which sources can load the page into a child frame

For other directives please refer to the link found on the References section below

Built-in Directive Values

Source Name
Description
'self'Refers to the origin from which request/response is being served. This allows all scripts from the origin server.
'none'Explicitly disallow script sources
'unsafe-inline'
Allows scripts that are coded in-line:
ex: <button id='sampleId' onclick='confirm('are you sure?')' />
'unsafe-eval'
Allows scripts that use the eval() method, which creates javascript code from strings
ex: var value = eval(new String(a + b))

Monday, October 8, 2018

Angular CLI Primer

What is Angular CLI?

Angular Command Line Interface, makes it easy to create an application that works and follows best practices right out the box.
It takes care of most of managing the dependencies and boiler plate code when creating Angular projects.


Requirements 

  • Node (Version  8 or higher)
  • NPM (usually bundles with node, version 5 or higher)
  • Code editor tools (ex. Visual Studio Code)


Checking for node version:

> node -v

Checking npm version

> npm -v

Installing Angular CLI

> npm install -g @angular/cli


Creating a new application

> ng new application_name

Some Useful Options Flag

  • --help This applies to almost all, if not all, the command line interfaces used
  • --dryRun or -d Displays files that would be generated when running the cli command
  • --directory Specifies directory to where the application would be generated
  • --skip-install Skips installation of dependency packages

Running the application

> ng serve -o


References

Friday, August 17, 2018

SOLID Principles in OOP

(S)ingle Responsibility Principle
This states that a class should only have a single responsibility.

(O)pen Closed Principle
Open for extension and closed for modifications.

(L)iskov Substitution Principle
Objects should be replaceable with instances of their subtypes

(I)nterface Segregation Principle
Many client-specific interfaces are better than one general-purpose interface

(D)ependency Inversion Principle
Depend upon abstractions, not concretions


Reference
https://en.wikipedia.org/wiki/SOLID

Entity Framework Core Notes Part 1

We execute command line commands to add/update database or to generate model from a database.
We can either execute them on the command line,  powershell or Visual Studio's package manager console.

On previous versions of Entity Framework, we need to execute the command below to setup migrations on the project, to create the migrations folder:

> enable-migrations 

This is already considered obsolete in Entity Framework Core. The Add-Migrations script automatically creates for you the migrations folder, unless you have specified it explicitly with specific command line parameters.


Commands (Package Manager Console):

Adding migration scripts to the project.

> Add-Migration

Specifying a Migration name

> Add-Migration MyFirstMigration

Specifying a Migrations output directory

> Add-Migration MyOtherMigration -OutputDir OtherMigrationsDirectory

Targeting a Project for Migration

> Add-Migration SpecifiedProjectMigration -Project OtherCodeFirstProject

Applying the Migration scripts to the Database

> Update-Database

The following command removes the previous Migration

> Remove-Migration


Creating your models from an existing database


> Scaffold-DbContext "<ConnectionString>" Microsoft.EntityFramework.SqlServer -OutputDir Models

Thursday, August 9, 2018

Entity Framework Core 2.1 Package Installation

Entity Framework Core Packages
On your project install the following NuGet Packages


  • Microsoft.EntityFrameworkCore
  • Microsoft.EntityFrameworkCore.Design
  • Microsoft.EntityFrameworkCore.Relational
  • Microsoft.EntityFrameworkCore.SqlServer  -- Provider based
  • Microsoft.EntityFrameworkCore.Tools -- (optional)

Installing the packages using Package Manager Console (Tools > NuGet Package Manager > Package Manager Console)
  1. Make sure you are in the correct directory by typing in dir then press enter.
  2. Install-Package <Package Name> 

Installing the packages using Visual Studio's NuGet Package Manager
  1. Go to Tools > NuGet Package Manager > Manage NuGet Packages for Solution
  2. Search for Microsoft.EntityFrameworkCore

Installing the packages by editing the Project (Visual Studio 2017)

Another way of installing the EF packages is by editing the project. Paste in the following inside the <Project> scope.

<ItemGroup>
   <PackageReference Include="Microsoft.EntityFrameworkCore" Version="2.0.3" />
   <PackageReference Include="Microsoft.EntityFrameworkCore.Relational" Version="2.0.3" />
   <PackageReference Include="Microsoft.EntityFrameworkCore.Design" Version="2.0.3" />
   <PackageReference Include="Microsoft.EntityFrameworkCore.SqlServer" Version="2.0.3" />
   <PackageReference Include="Microsoft.EntityFrameworkCore.Tools" Version="2.0.3" />
</ItemGroup>

Save project then on the Package Manager Console, enter the command below to restore the packages to the project:

> dotnet restore

Wednesday, July 25, 2018

TypeScript Fields

Just like regular OOP classes, you can define fields in a Typescript class. On the next section are samples on how you define them.

By default access modifiers on the fields are public, however you can explicitly set it to private or public.


class SampleFields {
id: number;
name: string;
description: string;
}

On the above example, field types are explicitly set.

A similar C# class would look like the following:

public class SampleFields
{
    public int id;
    public string name;
    public string description;
}

Do note that type can be inferred:

class SampleFields {
id = 0;
name = "";
description = "";
}


Fields can also be defined on the constructor:

class SampleFields {
constructor (public id = 0, public name = "", public description = "") {
}
}
or
class SampleFields {
constructor (public id: number, public name: string, public description: string) {
}
}

This is called shorthanding

The following statement would only set the fields as local to the constructor block, thus is different from the examples above.

class SampleFields {
constructor (id: number, name: string, description: string) {
}
}

Do note that when accessing class scoped fields, we need to use the this keyword

class SampleFields {
constructor (public id: number, public name: string, public description: string) {
}

setFields() {
this.id = 1;
this.name = "SomeName";
this.description = "Some Description";
}
}


This is it for Typescript fields for now, do leave me a comment if you have corrections or questions.

K, Bye!