1. Create a blank solution, we can do this by clicking on the Create a new project on the Visual Studio 2019 home/welcome screen.
2. On the Create a new project screen, we can type in "Solution" on the search box, select the Blank Solution option then click on the Next button found at the bottom right of the screen.
3. Enter a solution name and select a folder to where the solution file would be saved.
4. Now that we have the solution let's add a new project, we can do this by right-clicking on the Solution Explorer pane, select Add then New Project.
5. First we create a C# Class Library project, type in "Class Library" for the Entity Framework Core data classes. You can enter your specific name for the class library. You can delete the auto-added Class1 class file as we are not going to use that.
6. Then let's create a new Class Library project for the Domain/Entities, this time you can select the Class Library from the Recent project templates
7. We then add the console app that would implement the domain service. On the Add new project screen, let's search for the C# Console app
8. Now that we have all our needed projects, let's add the project references of the Domain/Entities and Data projects to the Console App. On the console app tree,right-click Dependencies then click on Add Reference. Check the two projects there.
9. We also need to add a reference of the Domain/Entities project to the Data project, as we would be using the entities there to build our DbSets. DbSet class is used to perform the Create/Read/Update/Delete (CRUD). They are used to map the tables to the database.
10. We then need to install the Entity Framework Core packages as they are not added by default. We can do this by using the Package Manager console or the Manage NuGet Packages option, we are going to use the latter.
11. Right-click on the Data project, then select Manage NuGet Packages.
12. On the NuGet Package screen click on Browse, as this would allow us to search online for the package then on the search textbox enter "EntityFrameworkCore.SqlServer". This is the option that we will also choose as this would install all the required EF Core packages we need as well. Select the latest stable version then click on Install
13. We should now have the three EF Core packages installed on the Data class library:
- Microsoft.EntityFrameworkCore
- Microsoft.EntityFrameworkCore.Relational
- Microsoft.EntityFrameworkCore.SqlServer
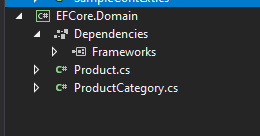
14. Next up, we are going to add some sample Entities on our Domain class library:
- ProductCategory
- Product
This entities would represent the our database tables, notice on the Product class we added a reference to the ProductCategory, now EF Core is smart enough to determine the relationships between the classes and also the primary key it would use for the tables it would generate.
15. Next we need to add a Context class in our Data class library. This class is would let EntityFramework know which entities represents a table in our database. We define them by using the DbSet type ex. DbSet<ProductCategory> ProductCategories.
16. Now we implement this on our Console App. We also need to make sure that our Console App is the starting project, you can do this by right-clicking on the project and clicking on Set as Startup Project
Our Main.cs class code
EnsureCreated() makes sure that the Database and tables are already created in our DB, if not this execution would create them.
17. Now we execute the code by clicking on F5 or ctrl + F5 (No debugging). The initial loading should take a while as EF Core would be generating the database scripts first based on the DbSets we have. Then it would use them to create the database and tables based on the connection string we have set. You should get the results below:
18. If you would check your database using SQL Server Manage Studio, you should be able to see your DB and table there:
19. As you can see from the Main class code, working on database is just like using collections and linq. For more information about Entity Framework Core, you check on the Microsoft Documentation site for it:
Happy coding!


No comments:
Post a Comment